
GitHub Actions using the Standard Banking Demo: Put Your First Workflow in Action
In this tutorial, we are going to define a workflow for the Banking microservice and the related micro frontends.
Initiate the Github Actions Workflow
To understand this article you’ll need to reference the Standard Banking Demo, which is a sample modular project provided by Entando.
Because this project contains multiple applications, we have to create one workflow per application to separate them into clear pipelines.
In this tutorial, we are going to define a workflow for the Banking microservice and the related micro frontends.
After checking out the project, create a file at this location: .github/workflows/banking-plugin-ci.yml
Copy the global properties at the top of the file:
name: Banking Plugin CI on: push env: PROJECT_NAME: banking-plugin jobs:
- name is the workflow name
- on defines the triggers the workflow is listening to
- env defines a list of reusable environmental properties available to the workflow
- jobs is the list of jobs the workflow executes
Add a Backend Job
The first job performs this sequence of steps:
- Checkout the project
- Install Java 11
- Run the backend tests
- Package the application
Each job is a new entry in the job list and runs concurrently with the other jobs.
The job has to declare the runner it uses and the sequence of tasks, or steps, it executes.
jobs: backend: runs-on: ubuntu-latest steps:
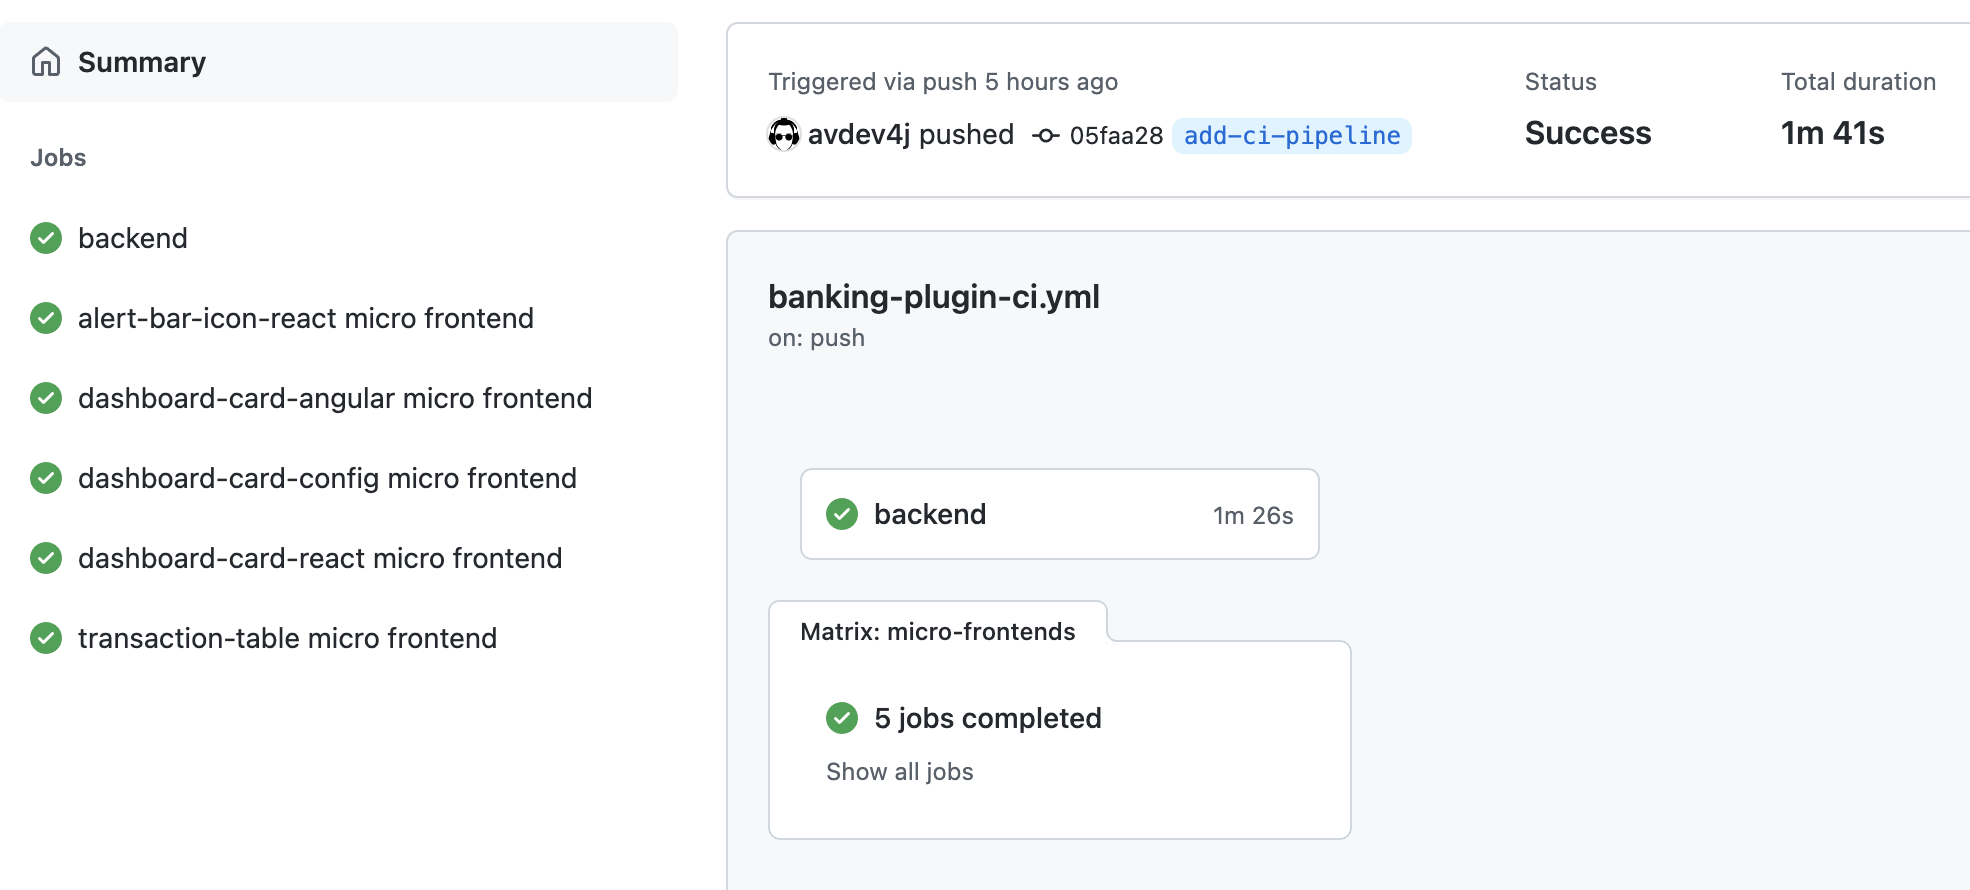
Please note this “backend” entry matches the job name used in the GitHub Action UI.
To define a step, you can either use existing actions from the marketplace, create your own composite actions with uses, or run a bash command with run.
steps: - uses: actions/checkout@v2 - uses: actions/setup-java@v1 with: java-version: '11.x' - name: Run backend test run: | cd $GITHUB_WORKSPACE/$PROJECT_NAME chmod +x mvnw ./mvnw -ntp clean verify - name: Package application run: | cd $GITHUB_WORKSPACE/$PROJECT_NAME ./mvnw -ntp package -Pprod -DskipTests
Please note the commands use environment variable values ($GITHUB_WORKSPACE/$PROJECT_NAME) provided by GitHub Actions or defined at the workflow or job level.
Add a Matrix Job for the Micro Frontends
The matrix feature allows you to run multiple jobs with the same configuration of matrix variable values.
Each matrix variable is usable in the job via a template ${{ matrix.<NAME> }}, for example ${{matrix.widget}} in the code below.
Learn more about the matrix feature in the official documentation.
Initiate the Matrix Job
name: ${{ matrix.widget }} micro frontend
strategy: fail-fast: false matrix: widget: - alert-bar-icon-react - dashboard-card-angular - dashboard-card-config - dashboard-card-react - transaction-table include: - widget: dashboard-card-angular test-script-name: test-ci
steps: - uses: actions/checkout@v2 - uses: actions/setup-node@v2.1.4 with: node-version: '14.15.0' - name: Run tests run: | cd $GITHUB_WORKSPACE/$PROJECT_NAME/ui/widgets/banking-widgets/${{ matrix.widget }} npm install npm run ${{ matrix.test-script-name || 'test' }}
- At the same indentation level as the backend, add a new entry named micro-frontends.
- Use the matrix variable to differentiate each job by name.
- Copy the runner definition from the previous job description.
- Add the list of micro frontend names to the matrix strategy. Setting the fail-fast to false allows the jobs to continue if one or more is failing.
- Add steps to checkout the code, install NodeJS, and run both npm install and npm test.
The Final Workflow Definition
name: Banking Plugin CI on: push env: PROJECT_NAME: banking-plugin jobs: backend: runs-on: ubuntu-latest steps: - uses: actions/checkout@v2 - uses: actions/setup-java@v1 with: java-version: '11.x' - name: Run backend test run: | cd $GITHUB_WORKSPACE/$PROJECT_NAME chmod +x mvnw ./mvnw -ntp clean test - name: Package application run: | cd $GITHUB_WORKSPACE/$PROJECT_NAME ./mvnw -ntp package -Pprod -DskipTests micro-frontends: name: ${{ matrix.widget }} micro frontend runs-on: ubuntu-latest strategy: fail-fast: false matrix: widget: - alert-bar-icon-react - dashboard-card-angular - dashboard-card-config - dashboard-card-react - transaction-table include: - widget: dashboard-card-angular test-script-name: test-ci steps: - uses: actions/checkout@v2 - uses: actions/setup-node@v2.1.4 with: node-version: '14.15.0' - name: Run tests run: | cd $GITHUB_WORKSPACE/$PROJECT_NAME/ui/widgets/banking-widgets/${{ matrix.widget }} npm install npm run ${{ matrix.test-script-name || 'test' }}
Conclusion
After exploring GitHub Actions in the first article, we learned how to build a successful workflow using the real-world example of the Entando Standard Banking Demo.
Depending on your needs, your workflow can be modified to add more steps such as security, quality scanning and/or event UI testing. These automatic gates keep the focus on your high-level priorities while ensuring your applications continue to support the requirements and needs of your enterprise.
Stay tuned for part 3 of this series. I’ll be sharing my top 3 advanced features - don’t miss this one!